


Retaining walls made simple: budget, drainage, and block choices that last.
Small grade changes can transform a yard, but the planning can feel complicated. The good news is that today’s manufactured retaining wall systems make short, durable walls achievable for DIYers and small crews with basic tools and a clear plan.
This step-by-step guide walks you through wall selection by application, practical rules of thumb, and installation basics that protect your budget and your back. You will learn when a gravity wall is enough, when to reinforce, and how to build in the drainage that keeps walls straight for years.
If you prefer to price materials and see options side by side, bring your dimensions to a nearby Lee Building Products showroom. Local teams can help with block counts, caps, connectors for geogrid, and in-stock color options for your market.
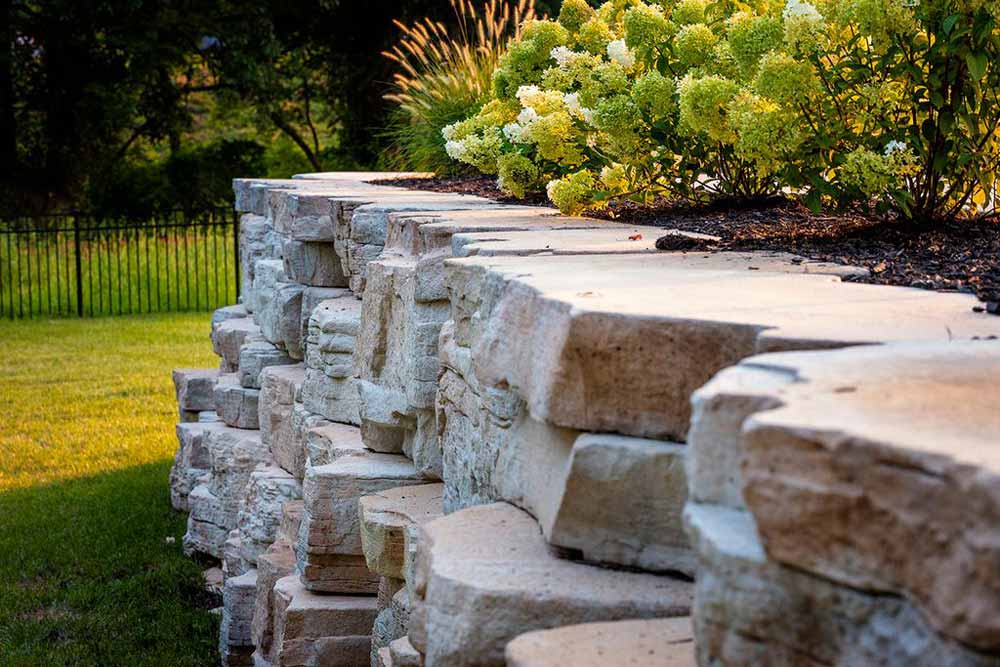
Choose the right system for the job
Pick a system that matches the look you want and the loads your site will place on the wall.
- Southern Traditions garden walls: Best for aesthetic borders, planters, and low seat walls where a softer, blended look matters. Great for weekend projects that frame beds and patios.
- CornerStone and StoneVista modular walls: Workhorse segmental retaining wall (SRW) systems for strength and versatility. Use them for straight runs, curves, steps, pillars, and planters with consistent setbacks and tight alignment.
- Fortus 12D by CornerStone: A lighter, hollow-core unit with SureGrip handholds and a rear lip that helps keep rows straight. Easier to handle on long runs or tight access sites. Suitable for gravity walls in proper conditions and can accept geogrid with connectors when engineering requires it.
- Rosetta Kodah: Clean-lined, natural-stone texture in a double-sided format for freestanding seat walls and partition walls where both faces are visible. Also used for terraces and garden beds when you need an elevated look that ties in with steps and coping.
When in doubt, match the system to your tallest wall segment and site loads so the whole project uses one compatible family of blocks, caps, and steps.
Plan the base and first course
The first course does most of the work. A level, compacted base and a dead-level starter row will save hours of correction later.
- Base depth: Excavate for a trench wide enough to fit the block plus 6 inches in front and behind. Depth typically includes 6 to 8 inches of compacted base stone plus enough depth to bury at least 10 percent of the wall height for the first course.
- Base material: Use a well-graded base aggregate compacted in 2 to 3 inch lifts to at least 95 percent of maximum density. Many installers use dense-graded aggregate for the base and switch to 3/4 inch clean stone directly behind the wall for drainage.
- Leveling pad: Top the compacted base with a 1 inch layer of screeded stone for fine leveling. Set the first course so it is perfectly level front to back and side to side. Take time here. It controls the look and stability of every course above.
Get drainage right
Water is the number one cause of wall movement. Give it a path to leave the backfill.
- Backfill zone: Fill the space directly behind the wall with 3/4 inch clean stone from the footing up to within about 12 inches of the top grade. This creates a vertical chimney that relieves pressure.
- Pipe: Place a perforated drain pipe at the base of the wall, daylighted to a low point. Wrap it with fabric if local soils are fine and prone to migration.
- Fabric: Separate native soils from the clean stone with a non-woven geotextile to keep fines from clogging the drainage zone.
- Surface water: Grade the finished surface to shed water away from the wall. Keep downspouts and irrigation from saturating the backfill.
Walls around 4 feet tall and above absolutely need drainage. In practice, every retaining wall benefits from a clean stone backfill and a drain line because water pressure can build even behind short segments.
Build the wall body
After the first course is set and back drainage is started, stack additional courses, sweeping and checking level as you go. Stagger joints per the manufacturer’s pattern, and pull a string line on long runs to stay true. For Fortus 12D and other rear-lip systems, seat each block so the lip engages the course below for consistent setback.
If engineering calls for reinforcement, install geogrid at the specified courses. Pull it tight, pin if needed, and backfill with compacted lifts of clean stone and suitable soils beyond the drainage zone. Keep compactors off the block face to avoid creep.
Cap installation
Capping finishes the wall and helps lock the top. Dry fit first for overhangs and corners, then adhere with a high-quality concrete adhesive on clean, dry surfaces. For double-sided looks such as Rosetta Kodah seat walls, choose matching coping for a refined edge.
When to call an engineer
Local code thresholds and site conditions dictate when a wall moves from DIY to engineered.
- As a rule of thumb, SRW walls around 3 feet and taller, such as StoneVista in residential settings, typically require engineer approval per International Building Code (IBC) guidance.
- Large-format systems like MagnumStone around 4 feet and taller also require engineered design.
- Any wall, regardless of height, that supports a slope, driveway, structure, fence, or other surcharge should be reviewed by an engineer. Poor soils or groundwater issues also trigger engineering.
Your local Lee team can connect you with product documents and technical representatives and help you plan the material package to match engineered specs.
Rules of thumb you can trust
- Bury 10 percent of wall height for the first course.
- Use 3/4 inch clean stone behind the wall, and install a perforated drain at the base that daylights.
- Compact base in thin lifts; a plate compactor is worth the rental.
- Keep the first course dead level; small errors multiply.
- Do not backfill with topsoil in the drainage zone. Use clean stone and suitable structural fill beyond it.
Common mistakes to avoid
- Skipping drainage or using only dirt behind the wall.
- Setting on uncompacted fill or a thin base.
- Forgetting to separate soils and stone with fabric.
- Building too close to property lines without verifying setbacks and utilities.
- Underestimating weight. Use team lifts or equipment for safety.
Safety notes
Retaining wall blocks and caps are heavy. Wear gloves, eye protection, and boots. Team lift large units or use mechanical assistance. Keep staging areas level, secure loads, and never operate compactors or saws without training and appropriate guards and PPE. For gas-powered saws, follow ventilation and spark control guidance.
Budget guidance
For the lowest installed cost, small gravity walls built with modular concrete blocks are typically the most economical. Southern Traditions garden wall units are cost-effective for borders and planters. For taller or loaded conditions, systems like CornerStone or StoneVista add performance and flexibility without jumping to large-format commercial blocks. Fortus 12D can lower handling time and waste on long runs because each unit is lighter and aligns more easily, which helps small crews control labor costs.
To compare real numbers for your project, visit a showroom with your measurements and a few site photos. Staff can outline block counts, cap pieces, drain materials, geogrid layers if required, and delivery options in your area.
Quick FAQ
- What is the easiest DIY retaining wall? Low garden walls and short gravity walls built with modular concrete units, such as Southern Traditions for borders or Fortus 12D for easier handling, are among the easiest. Keep height modest, prepare a compacted base, and include drainage.
- What is the cheapest retaining wall to build? The most budget-friendly options are usually small gravity walls using standard concrete blocks installed on a compacted aggregate base with clean stone backfill. Costs vary by region and height.
- Does a 4 ft retaining wall need drainage? Yes. Plan on a perforated pipe at the base that daylights, 3/4 inch clean stone backfill, and fabric separation. In many markets, walls near this height also trigger engineering review per IBC guidance.
- Should you put gravel or dirt behind a retaining wall? Use 3/4 inch clean stone behind the wall, not dirt. Separate native soils from the stone with a non-woven geotextile to prevent clogging and pressure build-up.
- How long will a block retaining wall last? With a proper base, drainage, and, where needed, engineered reinforcement, modular block walls often perform for decades. Lifespan depends on site soils, water management, loads, and installation quality.
See options in person and get a takeoff
Bring your wall dimensions and a sketch to a Lee Building Products showroom. The team will help you compare colors, feel the block textures, and leave with a material list for blocks, caps, pipe, fabric, and geogrid connectors. If your project would benefit from local pros, you can also explore resources for Indianapolis residential landscaping or connect with hardscape contractors in Nashville through our regional pages:
- Browse options for Indianapolis landscaping and retaining wall materials at our Indianapolis pages.
- If you are planning a project in Middle Tennessee, explore resources for Nashville hardscape contractors and retaining wall systems.
Helpful links:
- For materials and support in central Indiana, start with our Indianapolis landscaping resource: https://www.leebp.com/indianapolis-landscape-supply/
- For Nashville area hardscape contractors and resources: https://www.leebp.com/hardscape-contractors
- Learn about Rosetta Kodah and other coordinated stone options: https://www.leebp.com/rosetta-pavers-superior-steppers
Summary
A lasting retaining wall comes down to three things: choosing the right system, starting on a level, compacted base, and giving water a clean way out. Keep heights realistic for DIY, use 3/4 inch clean stone, add a perforated drain, and do not rush the first course. When loads or heights increase, bring in an engineer and match the wall system to the design. Ready to plan with confidence? Bring your measurements to a Lee showroom, and we will help you turn them into a clear material list and a wall that looks right and lasts.
